5 Clever Ways to Reuse Candle Jars

reuse candle jars

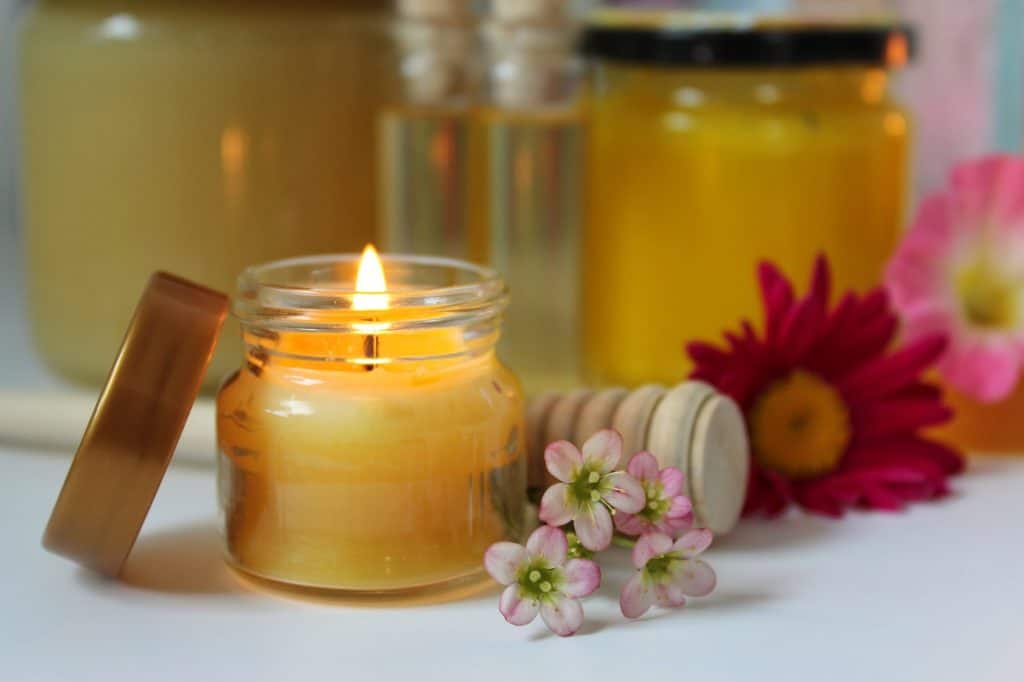
Most people who enjoy candles prefer ones that come in attractive containers. That way, not only do they smell good, but they look good, too. But, once relighting the wick becomes impossible, figuring out what to do with the candle jars isn’t always easy. Throwing them away seems like such a waste or even a pity.

Luckily, you don’t have to toss out amazing candle jars. Instead, you can upcycle them and make them lovely additions to your home. If you want a reason to keep more of yours, here are five clever ways to reuse candle jars.

reuse candle jars

5 Clever Ways to Reuse Candle Jars

1. Organize Bathroom

If you want to keep your bathroom counters organized, candle jars can be an asset. Once cleaned out, you can use them to store a variety of items, including cosmetics, cotton swabs, toothbrushes, and more.

Place like items in jars together. This makes your organization look very intentional, enhancing the look and function. You’ll be able to find what you want with ease, all without having to leave items scattered on the counter.

2. Succulent Pots

Many candle jars are a great size for small succulents. Plus, the look can be incredibly elegant, especially if you group a few together that feature succulents in different colors.

If you want to make sure the succulents flourish, choose a cactus-style soil mix and make sure you don’t overwater. Candle jars don’t have drainage holes, so excess water won’t run out through the bottom. As a result, you have to be careful not to go too far, or your succulents won’t be happy.

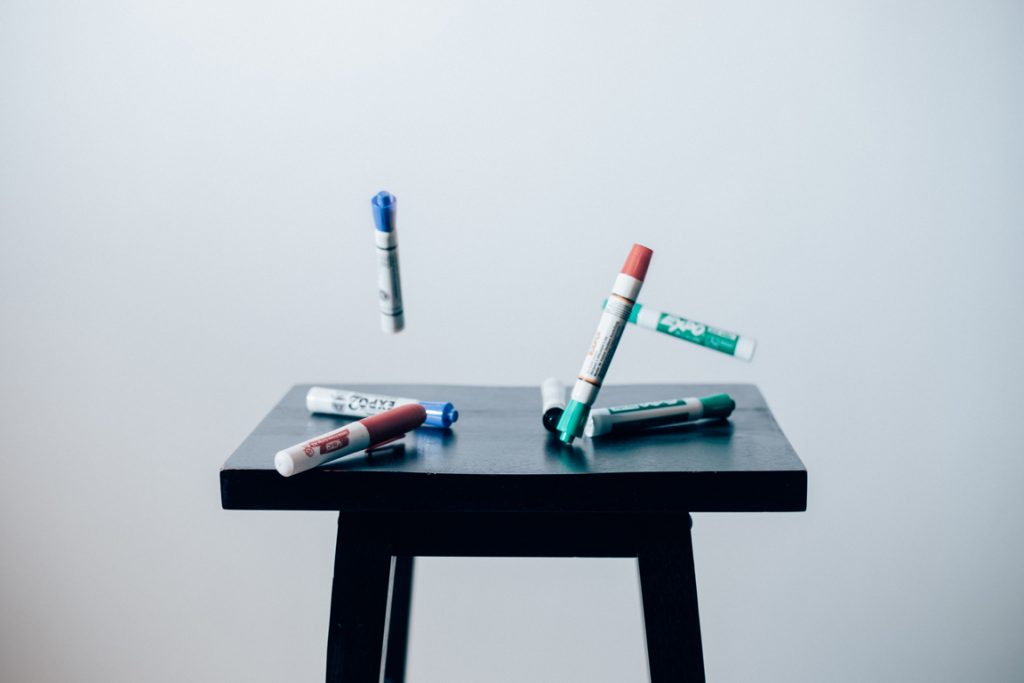
3. Craft Supply Storage

Using candle jars to organize colored pencils, markers, paintbrushes, or a variety of other items can be a great option. It ensures everything has its place while keeping all of your craft supplies highly accessible.

If your candle jars have lids, they can even be used for craft item storage. You can stash away nearly anything and still see inside the container, ensuring you can locate what you want quickly when it’s time to craft again.
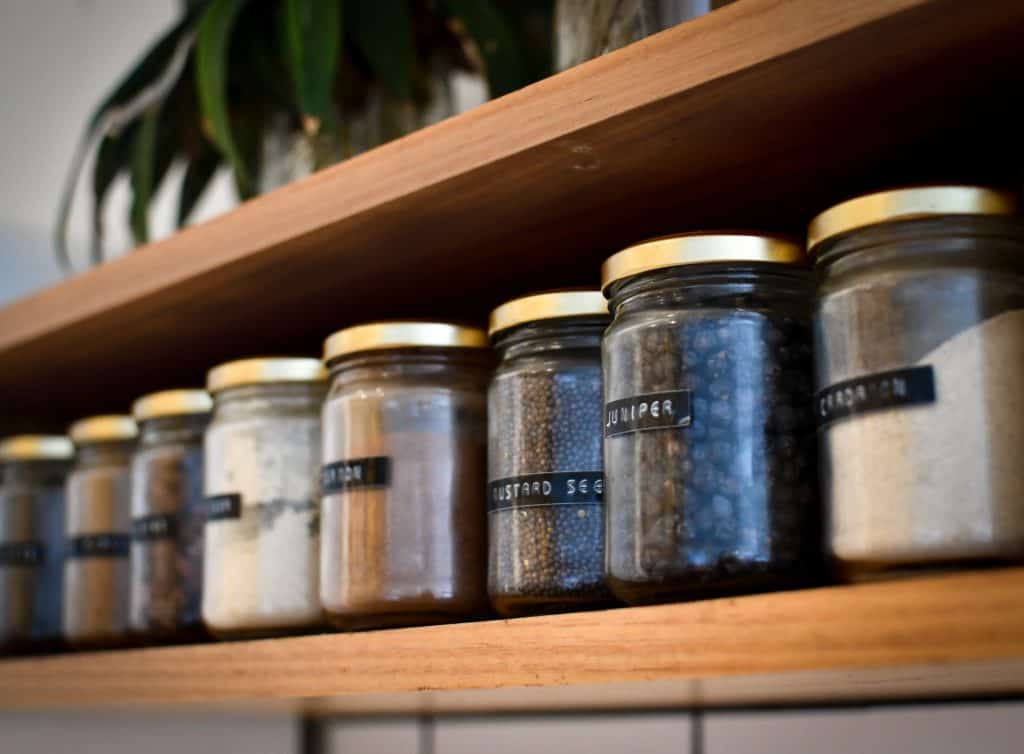
4. Store Spices

If you have small candle jars with lids, then they might be the perfect option for storing spices. This is especially true if you grow and dry your own herbs and need a place to keep your haul.

Just make sure that you spend a good amount of time cleaning and sanitizing your candle jars first. You don’t want any residue to get on your spices, so go the extra mile when prepping the jars.

5. Small Gift Baskets

For something a little quirky, consider turning your larger candle jars into makeshift gift baskets. You can tuck small items that go together inside, allowing you to present the present in any unexpected and attractive way.

Tip: How to Clean Wax Out of Candle Jars

If you want to reuse your candle jars, you’ll need to get any remaining wax out. Begin by scraping out as much as possible. You might want to use an old spoon or free pieces from the edge with a butter knife.

At that point, you have a few approaches that could work if you still have wax that you need to remove. You can put the jars in the freezer for a few hours, as this can cause the remaining wax to shrink, making it easier to pop out.

It’s also possible to use hot or boiling water. Once the jar is on a protected surface, heat some water and pour it inside the jar carefully, leaving room at the top. As the wax melts, it will float to the top. After the water cools, you can remove the now-floating wax.

With either of those approaches, once the wax is out, you’ll just need to clean the inside of the candle jars. Usually, a bit of dish soap and warm water will do the trick.

Bonus Tip: Removing Labels from Candle Jars

If you have a beautiful candle jar but can’t seem to get all of the sticky label off, you’re in luck. The process can actually be pretty simple, as long as you have the right stuff.

First, soak the jar in hot water and remove as much of the label as possible. You might want to use an inexpensive paint scraper, as this can make the process easier.

Once you’re down to mostly residue, make a mixture of solid coconut oil and baking soda. The coconut oil helps reduce the stickiness of the residue while the baking soda is abrasive. Place some of the mixture on the residue and use circular motions to work it away. Just make sure that you wear gloves, as the baking soda can wreak havoc on skin.

When you get the residue off, just wash the jar with dish soap. That will remove the oil from the glass, leaving it clean and ready to use.

10 Kitchen Storage Hacks on a Budget

kitchen storage hacks

Many households struggle with kitchen storage. Finding a place for every pot, pan, utensil, and small appliance can be a challenge in and of itself. Then, when you add in having to organize foods, seasoning, and pantry staples, it can quickly turn into a nightmare.

While remodeling your kitchen is technically always an option, it isn’t a practical one for everyone. Many families can’t afford to spend the tens of thousands of dollars it would take to rework this critical space; it’s that simple.

Luckily, there are plenty of kitchen storage hacks that are affordable, effective, and even attractive options.

What Are Kitchen Storage Hacks?

In the simplest terms, a kitchen storage hack is an option for getting organized using a non-traditional approach. It could include using a product in a new way or making use of something that you already have (or can get for essentially nothing) to make your space more usable and efficient.

If you need to whip your kitchen into shape, are ten kitchen storage hacks for families on a budget.

10 Kitchen Storage Hacks

1. Turn to Jars

Many food items come in jars. Whether you purchase spaghetti sauce, baby food, or pickles, those glass containers can work wonders when you need to organize a kitchen. So, make sure to keep them once they are empty.

Once you have them, you can fill them with all kinds of smaller items. Plus, they are clear, so you can see exactly what’s in each one. Just remove the labels and you’re set.

Plus, jars can create a unique opportunity. With some plumbing straps, you can keep them on a wall. If you make a hole in the lid, you can screw them into the underside of your cabinets, creating an extra layer of storage aside from the existing shelves.

If you’re buying foods in jars already, these containers are completely free. That makes them one of the most budget-friendly options around.

organize kitchen

2. Use Magazine Holders

Inexpensive magazine holders can be a great option for adding pseudo-shelves in a freezer. Essentially, you’ll be creating slots that can hold items, making them easier to grab without having to dig through piles of stuff.

You can also use magazine holders in your cabinets. They can be ideal for storing a range of slim items, especially cutting boards and food container lids.

3. Try Magnets

Magnets are an often-underutilized kitchen storage hack. Plus, they are incredibly inexpensive.

Glue some magnets to the inside of a cabinet door, and you can use them to hold baby food jars. This can be an excellent option for spices or other small items you need regularly.

If you get a larger magnet strip and attach it to the inside of a cabinet or on a wall, you can hang your kitchen knives. This can be safer than leaving exposed knife blades in a drawer, decreasing the odds that you’ll get cut while rummaging around.

storage hacks

4. Slice Boxes

Cereal boxes can be an excellent option for organizing drawers. Just slice the box horizontally, giving yourself a set of open rectangles. Then, you can set them in a drawer to create sections. Place various items – like larger utensils, serving spoons, ladles, and tongs – in different rectangles to make them easier to find and to keep them from getting jumbled up.

5. Use Curtain Rods

Cheap curtain rods can be very versatile. They are designed to carry a bit of weight, so you have a lot of options.

For example, place one in the back of a cabinet to hold your pot lids, allowing you to stack the pots themselves inside each other. You could also put one on the wall, get some inexpensive hooks, and hang your cooking utensils or kitchen towels.

kitchen storage

6. Try Tension Rods, Too

Many households keep cleaning supplies under the kitchen sink. After a while, you usually end up with a mess of products and have to dig around to find the one you need.

With a simple tension rod, you can get this often-neglected space organized. Any cleaning product with a spray nozzle can be hung up, making them easier to find. Plus, you’ll create more space for storing items on the shelf below, while increasing overall visibility.

7. Get Some Wire Shelf Risers

Another option that can essentially double your shelf space is wire shelf risers. These are great for organizing dishware, as you can separate each type without having to put bowls on plates or creating incredibly heavy piles.

There are also wire racks that can hang from shelves. These essentially accomplish the same task, creating additional layers that can help you organize.

kitchen organization

8. Invest in File Racks

If you want to organize your baking sheets, casserole dishes, and even slim pans, a file rack can be a great option. You can stash them vertically and keep them separated. That way, you can see everything you have and get to the right one without having to work your way through a pile.

9. Buy Some Hooks

The side of your lower cabinets can be a storage powerhouse if you use them right. Just attach a few hooks, and you can hang a variety of items in a spot that’s accessible. It can be a great option for colanders, cutting boards, measuring spoons, or anything else that’s fairly lightweight and has a handle or hole for hanging.

10. Get a Wine Rack

While a wine rack is an obvious choice for organizing your favorite wines, it can also be used for something else. If you several water bottles, thermos, or travel mugs, put them in the slots instead. You’ll be able to find each one with ease, and they won’t get knocked over or roll around during the search.

7 Organization Hacks for Your Home Office

home office organization hacks

Whether you work from home full-time or use your home office as a command center for your household, being organized is a must. Usually, you’re dealing with a lot of items, ranging from electronics to paperwork to office supplies. If you don’t spend time keeping everything in order, your home office becomes harder to use. You won’t be able to find what you need quickly and easily, and that costs you valuable time.

Luckily, whipping your home office isn’t shape doesn’t have to be challenging. Here are 7 organization hacks for your home office.

1. Color-Coded Files

If you have to keep track of paperwork, color-coded files can make a world of difference. You can separate your work and home documents and tell at a glance which files are which. It also makes it easier to put things away. Just look for the right color file.

You can use any color-coding approach that feels right for you. For example, if you run a home business, you might use a green file for income records and a red one for expenses. Then, you can tell right away what kinds of documents are where, making this organization hack a real time saver.

office organization

2. Set Up a Mail Station

Even though many people get their bills electronically, most households still get quite a bit of mail. By setting up a mail station, you can make sure that incoming mail is sorted quickly. You can have a basket for bills and personal files for every family member. That way, you can sort each piece quickly and know where things are at a glance.

If you want to go a step further with your mail station organization hack, place a document shredder near your mail station. That way, when you get credit card offers or other items that you don’t need to keep but don’t want to toss directly in the trash, you can shred them immediately.

3. Create Your Own Dry Erase Boards

Dry erase boards are great for tracking to-do lists, schedules, and more. But many store-bought options are surprisingly expensive. Luckily, making your own dry erase board is really easy.

You don’t need a special material to use dry erase markers. They work on many clear plastics and glass. As a result, any picture frame that still has its glass can become a dry erase board.

organization hacks

4. Embrace (Free) Containers

Containers are critical if you want to stay organized. It allows you to put small items in a designated spot, ensuring they don’t end up scattered throughout a drawer or all over your desk. But you don’t have to hit the store and spend a bundle to get the containers you need. If you’re like most households, you probably have some great options already.

If you’re looking for free containers, use the upcycling approach. A soup or coffee can be a sturdy option, for example. Shoe boxes are another great upcycling opportunity, as well as glass jars that you get when you buy spaghetti sauce, salsa, and many other products.

It usually isn’t difficult to dress up these free containers either. You might be able to use some spray paint, fabric scraps, cord (for wrapping), and similar options to make your free containers look chic.

5. Label Your Lidded Containers

If you’re using lidded containers, make sure you label them. Whether you write directly on the lid or use a label maker, the important part is to choose an approach that lets you know what’s inside without having to open it. That way, you won’t have to dig through several containers to figure out where something is. Plus, it increases the odds that you’ll use each container for a precise purpose.

organization hack

6. Think Vertical for Storage

Many home offices are a bit on the smaller side, so you need a storage organization hack to maximize your use of space. You might not have the option to bring in tons of furniture or have access to an ample closet, but that doesn’t mean you can’t find great ways to increase your storage capabilities.

If you need more storage options, think vertical. Your walls can be a resource when you make the most of that space. Installing shelves, hanging clips, and hooks can give you much more room than you had before. You can even mount slim boxes, cups, or other containers onto walls.

7. Label Your Cables

Cables can quickly become a jumbled mess if you have a handful of them all running to the same power strip or connecting to the same computer. Make it easier to figure out which is which by putting a label around each cable. Get some colorful washi tape and write what each cable does on it. Then, wrap it around the end of the cable. Now, if you need to unplug something fast, you know exactly which one to pull.

Ultimately, all of the tips above can help you organize your home office. Plus, most of them are incredibly low-cost, making them viable options for households on a budget or anyone who enjoys saving a pretty penny.

7 Easy Ways to Minimize Your Stuff

If you struggle to find items you need at home or spend a ton of time cleaning around clutter, it’s possible you have too much stuff. Often, people hold onto things because they provide them with a sense of security. But, if it’s gotten to the point where how much you have is becoming a burden or causing you anxiety, it’s time to let some of it go.

Luckily, minimizing your stuff doesn’t have to be a challenge. Here are seven easy ways to get started.

1. Institute a One-Year Rule

Sometimes, fear about needing an item is the only thing that stops you from getting rid of it. You might worry that the second you throw something away or donate it, you’ll suddenly run into a situation where it became necessary. This “just in case” mentality can lead to a lot of excess stuff.

The trick is, if you haven’t used an item within the past 365 days, there’s a decent shot that you genuinely don’t need it. By instituting a one-year rule, you can make quick decisions about what stays and what goes.

Take any time you don’t use regularly and put it in a box. Label that box with the date you filled it and schedule a reminder in your calendar to check it in one year. If you didn’t need to pull an item out during that 365-day period, then it’s probably time for it to go.

You can do the same thing with clothing, too. Take everything in your closet and hang it up, but put the hanger on the rail backward (with the point of the hook facing you instead of the curved section). As you wear an item, you put it back in your closet on a hanger facing the normal way. Then, once a year has passed, take everything that is still on a backward hanger and donate or sell it.

2. Don’t Hang on Due to Sentimental Value

Many people have strong emotional attachments to items that aren’t actually useful. When this happens, it isn’t the thing you want to keep. Instead, you want to hold onto the memory associated with the thing.

Don’t hang onto an item just because you’re feeling sentimental. If it has no other use, consider taking a photograph of the item and saving that in an album. That way, you can trigger that memory whenever you want while cutting down on your clutter.

3. Consider Your “Joy”

After the release of Tidying Up with Marie Kondo on Netflix, the concept of what “sparks joy” in your life became a popular way to determine what you should or shouldn’t keep. As you move through your home, consider whether its presence genuinely makes you feel happy. If the answer is a resounding “yes,” then hang onto it. But, if you hesitate to say “yes” or the answer is a clear “no,” donate it or throw it away.

4. Making Donating a Habit

Many households only donate items once or twice a year, if not less. As a result, it isn’t a habit to look at what you own and decide to make it available to someone else who could use it, even when you don’t actually need it.

By setting up a donation box in your home, you can start making it a habit. When you come across an item that doesn’t provide you with value but is in good condition, put it in the box. Then, the second the box is full, take it to a thrift store or anywhere else that accepts donations. Over time, donating will become second nature, making the process of avoiding clutter easier over the long-term.

5. Start with One Area

If you are overwhelmed by how much stuff you have, then it’s best to start small. Select a single area – like one closet, counter, or even just a single shelf – and focus on it. Take everything out of that area and put it in a big pile. Then, as you go to put each item away, consider whether you actually need it and make conscious decisions about what stays and what goes.

Once you’re finished with that area, pick another one and repeat the process. This breaks what can be a big job into smaller tasks, making it less intimidating. Plus, you can take breaks between each zone or decide to only tackle one area a day. That way, you aren’t pushing yourself to the point of decision fatigue or making the process so miserable that you give up.

6. Give Everything You Keep a Home

When you decide to keep something, don’t toss it just anywhere. Instead, designate a spot as its “home,” and make sure that it either always stays there or is always returned there after use.

By adopting that process, you can keep things orderly as you declutter and well into the future. Essentially, you’ll create an organizational paradigm with an inherent level of stability, making it easier to find critical items and prevent clutter from creeping back in.

7. One In, Two Out

One of the best ways to minimize your stuff is to use the one in, two out method. Every time you bring a new item into your home, you need to select two things that can either be thrown away or donated. Not only can this help you identify clutter, but it may also make you more intentional when you shop. Since you know you’ll need to get rid of a couple of items for each one you bring in, you’ll have to decide if that’s something you are willing to do.

All of the tips above can help you minimize your stuff. Consider giving them all a try and see if you can’t eliminate clutter from your home and life.

5 Easy Ways To Commit To Practicing Minimalism

Practicing Minimalism means eliminating excess, but it also means appreciating what you already have more. Here are 5 ways to practice minimalism when you’ve taken care of the big things.

Many people get caught up on the obvious aspects of Minimalism–getting rid of excess clothing or stuff around the house–but lose inspiration once their house is clean. Here at The Petit Four our family sometimes our family needs a reminder about living more with less. The following are five easy ways to commit to practicing Minimalism we use that will help you ensure that Minimalism stays a part of your everyday life, even after you’ve cleaned out your clutter.

1) Dine Out Less

Say what?? What has dining out to do with minimalism?

One of the most impactful ways to practice Minimalism is by committing to buying less. Most people assume this means objects that clutter up your home, but what about your daily specialty coffee? Or lunch out every day of the week?

You can regain control over your life by eliminating unnecessary expenses. If you normally buy coffee on your way to work, what about getting up a few minutes early to make coffee at home? Or, if you eat out for lunch, how about taking leftovers or committing to bringing a lunch from home?

Check your bank statement at the end of the month and you’ll be surprised at how much money you save–and how much money you now have for the things you really want–simply by cutting out a little extra. Instead of spending that money, why don’t you take what you normally would have spent on eating out and put it into a savings account? By the end of the year, you’ll have saved yourself hundreds of dollars (and probably kept some extra waste from filling up a landfill as well)!

2) Examine Your Routine

Document your daily life and use that list to focus on what you can minimize. Minimalism can be part of a smaller picture–your life and the moments in it–but it also manages to have a larger impact on your world. By eliminating waste from your life, you’re eliminating waste from the environment.

Study your routine — could you walk to work or carpool with a co-worker? Could you pack a lunch rather than buy take away? Could you pick up groceries as you need them, rather than doing a big shopping trip? What about gift cards for presents rather than buying random gifts that may never really be used? There are many little ways that you can impact your life and the world around you while making Minimalism part of your daily life.

3) Make Time For Meditation Every Day

Clearing out mind clutter can be just as important as eliminating physical clutter. Stress accumulates during the week with the pressures of life on your shoulders, but you can help mitigate how overwhelming this feels by utilizing meditation.

By focusing on the now and allowing meditation to ground you in the moment, you will help your mind truly focus on what’s important–your mental and physical health. Meditation allows you to spend time with yourself and quiet your mind, freeing you from negative thoughts that can lead to anxiety.

Meditation is a powerful tool that you can utilize during your Minimalist journey and one that will help keep you on track. Be present and focus on the now instead of worrying about every little thing that has happened, or might happen, and your world will open up in ways you never expected.

4) Give Yourself Achievable Goals

Committing to a Minimalist lifestyle can be a challenge, but you can help your chances of success by writing out tangible goals and working towards them.

Donate a bag of clothing you’re not using. Recycle a stack of books that you’ve never read. Stop eating out for lunch for one week–set goals that you know you can achieve and work from there.

You don’t need to be perfect all of the time and there are always setbacks in life, but by celebrating the small, achievable successes you will keep yourself on the path to making Minimalism a lifestyle change that sticks. Soon, you’ll realize that you’ve made a permanent and lasting change in your life and are fully committed to Minimalism.

5) Keep Your Spaces Clean

One of the easiest ways to practice Minimalism daily is by keeping your living, traveling and working spaces clean. This seems like an easy step, but when life gets busy, keeping everything tidy isn’t much of a priority. Don’t make excuses! Remember how much you enjoy the feelings of simplicity and cleanliness.

Let your outward spaces be a reflection of the inner peace you are striving for. If the first thing you see when you come home is a messy house, it’s going to have a negative impact on your practice of Minimalism, but if you see a tidy, beautiful space, you’re going to appreciate coming home so much more and feel in control of your life. What your spaces look like has such a profound impact on your inner peace, so keep your home, your car and your workplace tidy and keep up with your Minimalist lifestyle!

Minimalism gives you back control over your life and experiences and allows you to focus on what truly brings you happiness, without the clutter of day-to-day life getting in the way. These five easy ways to commit to practicing Minimalism will help ensure that you are able to adopt Minimalism as a permanent lifestyle change.